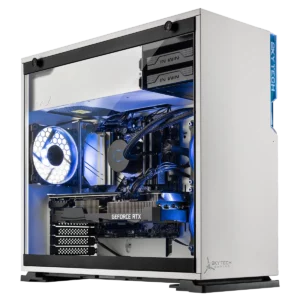
 BEST
BEST 
 ULTRA
ULTRA 
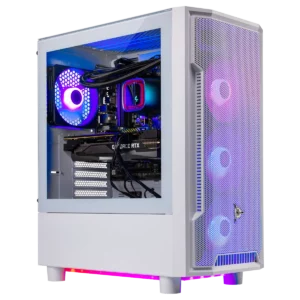
 GOOD
GOOD 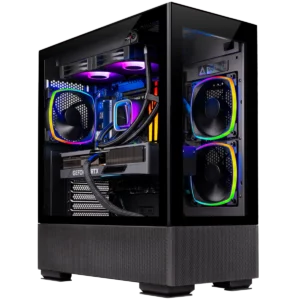

How to Troubleshoot No Power PC Issues

A no power PC issue can be devastating, whether you just got one or it’s an old friend. See if these steps can restore power to your system!
A no power issue, whether in an old PC or how a new PC greets you upon arrival, is an intimidating problem. But take a deep breath–there are some troubleshooting processes that may be able to help.
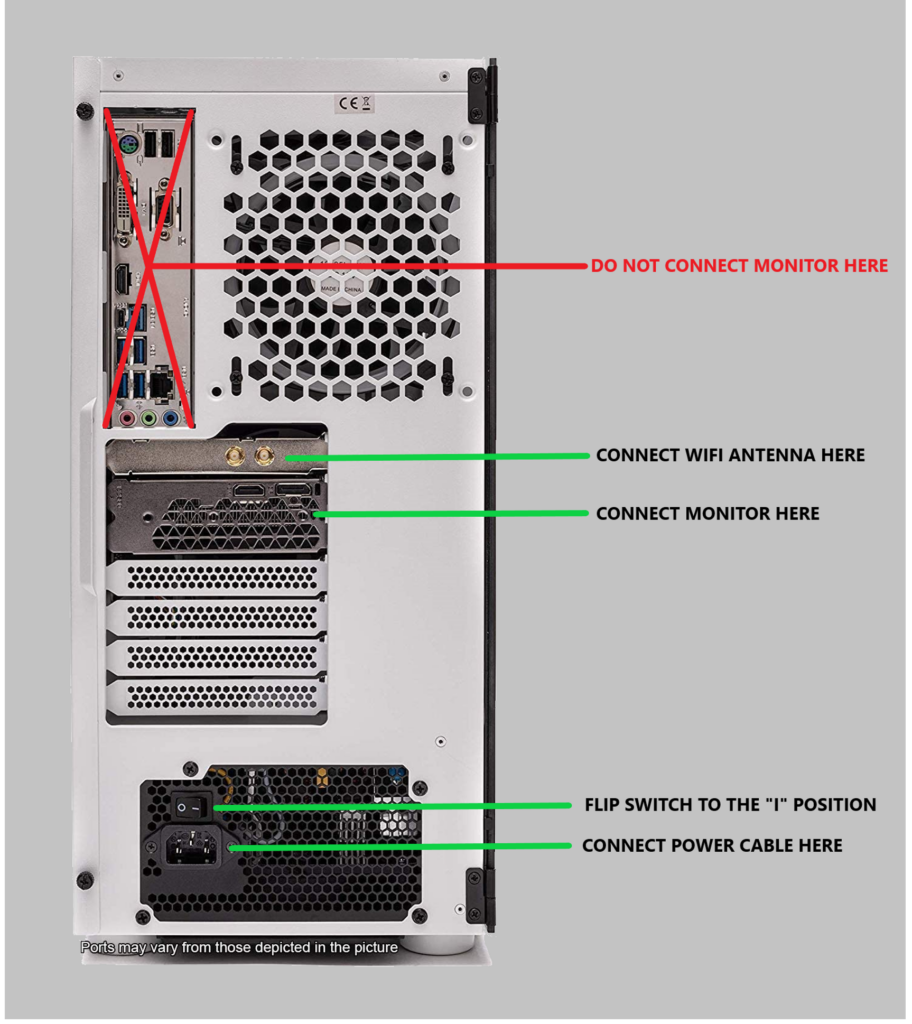
Make sure you can find your PC’s power button in the first place. Look up the manual for your PC’s case to find where your power button is. (Many of our customers have had trouble finding the power button on the Eclipse!)
The first thing you’ll want to take note of is whether your keyboard and mouse light up when your try to turn your PC on. This will help guide what next steps you should take.
No power troubleshooting – If the keyboard lights up:
Reseat power button header
- Before any following steps, please make sure:
- The computer is turned off
- The rocker switch on the back of your PC is switched from “I” to “0” so that no power is coming from your PSU to your machine.
- The PC is unplugged from the wall outlet. Then, please leave it off and unplugged.
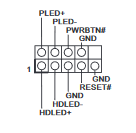
- Locate the PW SW/RES SW headers on your motherboard
- These headers are part of a set of headers called the “f-panel” or front panel headers. This set of headers is generally located on the bottom-right portion of the motherboard. You can find where your specific PW SW/RES SW headers are in this set by looking it up in the manual for your specific model and manufacturer of motherboard.
- Many motherboards will have their manufacturer and model name printed on them in text somewhere. If you have a Skytech Gaming PC, you can send a clear and well lit picture of your motherboard to our support team for help identifying it.
- While motherboards have many differences, most front panel header layouts are fairly standardized. Here is an example image of a standard f-panel layout:
- These headers are part of a set of headers called the “f-panel” or front panel headers. This set of headers is generally located on the bottom-right portion of the motherboard. You can find where your specific PW SW/RES SW headers are in this set by looking it up in the manual for your specific model and manufacturer of motherboard.
- You may need to remove the graphics card first, in order to easily access the headers.
- Once you find your PW SW/RES SW headers, reseat them by unplugging them and plugging them back into their respective spots securely.
- Plug your PC back in and try turning it on again.
We have a video guide from our staff that we hope you’ll find helpful for this process. It’s for front panel header installation, and shows a staff member plugging in the front panel plugs to their corresponding slots in a front panel header.
If that did not work, you can see if the issue lies in the power button with another test relating to those headers:
Jump PW/SW headers
- Leave your PC plugged in for these steps and leave the rocker switch on “I” so that power can flow through the machine.
- Get a thin, straight metal object such as a screwdriver.
- Unplug the PW and SW headers.
- Use your screwdriver to jump these two pins by touching them both with the screwdriver at the same time.
If your PC does turn on after you jump these pins, the issue is with the power button itself. You may be able to resolve this by replacing the button itself, or the front panel of your PC’s case. If you have a Skytech Gaming PC under warranty, contact our support team for more help with this.
Power cycle
- Switch your PC’s rocker switch to “0” and then unplug the power cable.
- Find your motherboard’s CMOS battery. You can find where it is by looking it up in the manual for your specific model and manufacturer of motherboard.
- Many motherboards will have their manufacturer and model name printed on them in text somewhere. If you have a Skytech Gaming PC, you can send a clear and well lit picture of your motherboard to our support team for help identifying it.
- You may still be able to locate it by sight without a manual. The CMOS battery is a flat silver battery about the size of a quarter.
- Remove your CMOS battery from your motherboard and set it aside safely for later.
- Allow a minute to pass. Then, press the power button on the PC repeatedly to drain the capacitors.
- Leave the CMOS battery outside of the motherboard for some time, about 5 minutes.
- Reinstall the CMOS battery
- Plug the power cable back in and switch the rocker switch on the back to “I”.
- Try to turn on your PC again
No power troubleshooting- If the keyboard does not light up:
Check external factors
- Power cable:
- Before the following step, make sure the rocker switch on the back of your PC is switched from “I” to “0” so that no power is coming from your PSU to your machine.
- Reseat your PC’s external power cable connection.
- Make sure it is snug, tight, and securely plugged back in before trying to turn the PC on again. A loose connection to external power can cause issues.
- Reseat your PC’s external power cable connection.
- Before the following step, make sure the rocker switch on the back of your PC is switched from “I” to “0” so that no power is coming from your PSU to your machine.
- Outlet/surge protector:
- Try another outlet and/or surge protector if possible to rule them out as potential causes.
- Rocker switch:
- When trying to turn on the PC, make sure the rocker switch is set to “I” and not “0” so that power can flow through the machine.
Reseat PW SW/RES SW headers and short to test
We cover these in the prior section, so skip up to those instructions, and then return here for the next processes if they do not resolve the issue.
CPU power cable reseat
- Before any following steps, please make sure:
- The computer is turned off
- The rocker switch on the back of your PC is switched from “I” to “0” so that no power is coming from your PSU to your machine.
- The PC is unplugged from the wall outlet. Then, please leave it off and unplugged.
- Locate your CPU power cable.
- This should be in the top left of your motherboard (black or black/yellow). It will be somewhat compact in size.
- Unplug this cable
- There should be a clip on the slot and on the plug itself.
- When unplugging, please press down and hold the clip on the plug continuously.
- There should be a clip on the slot and on the plug itself.
- Plug this cable back in tightly and securely
- Confirm that the clip on the slot and plug are lined up before reinserting the plug into the header.
- Do not press on the clip on the plug while reinserting.
- Plug your PC back in, flip the rocker switch, and try to turn it on again.
Motherboard power cable reseat
- Before any following steps, please make sure:
- The computer is turned off
- The rocker switch on the back of your PC is switched from “I” to “0” so that no power is coming from your PSU to your machine.
- The PC is unplugged from the wall outlet. Then, please leave it off and unplugged.
- Locate your motherboard power cable.
- This should be on the right side of the motherboard, near the middle. It will be large as it has 24 pins.
- Unplug this cable
- There should be a clip on the slot and on the plug itself.
- When unplugging, please press down and hold the clip on the plug continuously.
- There should be a clip on the slot and on the plug itself.
- Plug this cable back in tightly and securely
- Confirm that the clip on the slot and plug are lined up before reinserting the plug into the header.
- Do not press on the clip on the plug while reinserting.
- Plug your PC back in, flip the rocker switch, and try to turn it on again.
Power cycle
Again, this process is also covered in a section above. Scroll back up to there, and then return here if your issue is still not resolved.
Paperclip test
If none of the above processes resolved the issue for you, we recommend performing a paperclip test to determine whether your PC’s PSU has a hardware issue. SilverStone has a wonderfully detailed written guide for how to perform this test. We also have a video guide made by our staff:
- If you have a Skytech Gaming PC, when you insert the paper clip, take a clear and well-lit picture of how you did this, in case you need to contact support.
Need More Help with a Skytech Gaming PC?
If you have a Skytech Gaming PC, and you weren’t able to resolve your no power issue on your own, please contact our customer support team, and we’ll be happy to do our best to help. It will make it easier for our support team to help you if share the results if your paperclip test, if performed, including a picture of how you inserted the paperclip. If you notice any burnt/bulging capacitors or signs of burning/smoke, please send clear and well-lit pictures of this.
About Skytech Gaming
Skytech Gaming is a system integrator that builds prebuilt and custom PCs for both gaming and creative work. We aim to offer the best experience and performance at every budget, from low-cost entry level machines to the latest bleeding edge, high-end showcase PCs.
If you would like more information about our PCs, or have any more questions about RGB issues in a Skytech Gaming PC, please contact Skytech Gaming’s customer support team at (888)370-8882 or [email protected]. Our agents will be happy to do their best to help as soon as they can!