How to Install the 4090 GPU in your New Skytech PC
Wondering why the GPU in your computer hasn’t been installed yet? It’s because Nvidia 4090’s are HEAVY and to protect your investment we must pack it as securely as possible to avoid damage during shipment. Fret not! Installation is a simple process that requires just a few simple steps.
Written by: Jason M, Video by: Kris B
| October 19, 2022
You will need:
- Phillips head screw driver
- 5-10 Minutes
PLEASE UNPLUG YOUR PC FROM THE POWER OUTLET BEFORE STARTING
Never work on a PC that is connected to power to prevent electric shock.
Step 1 Remove foam packaging
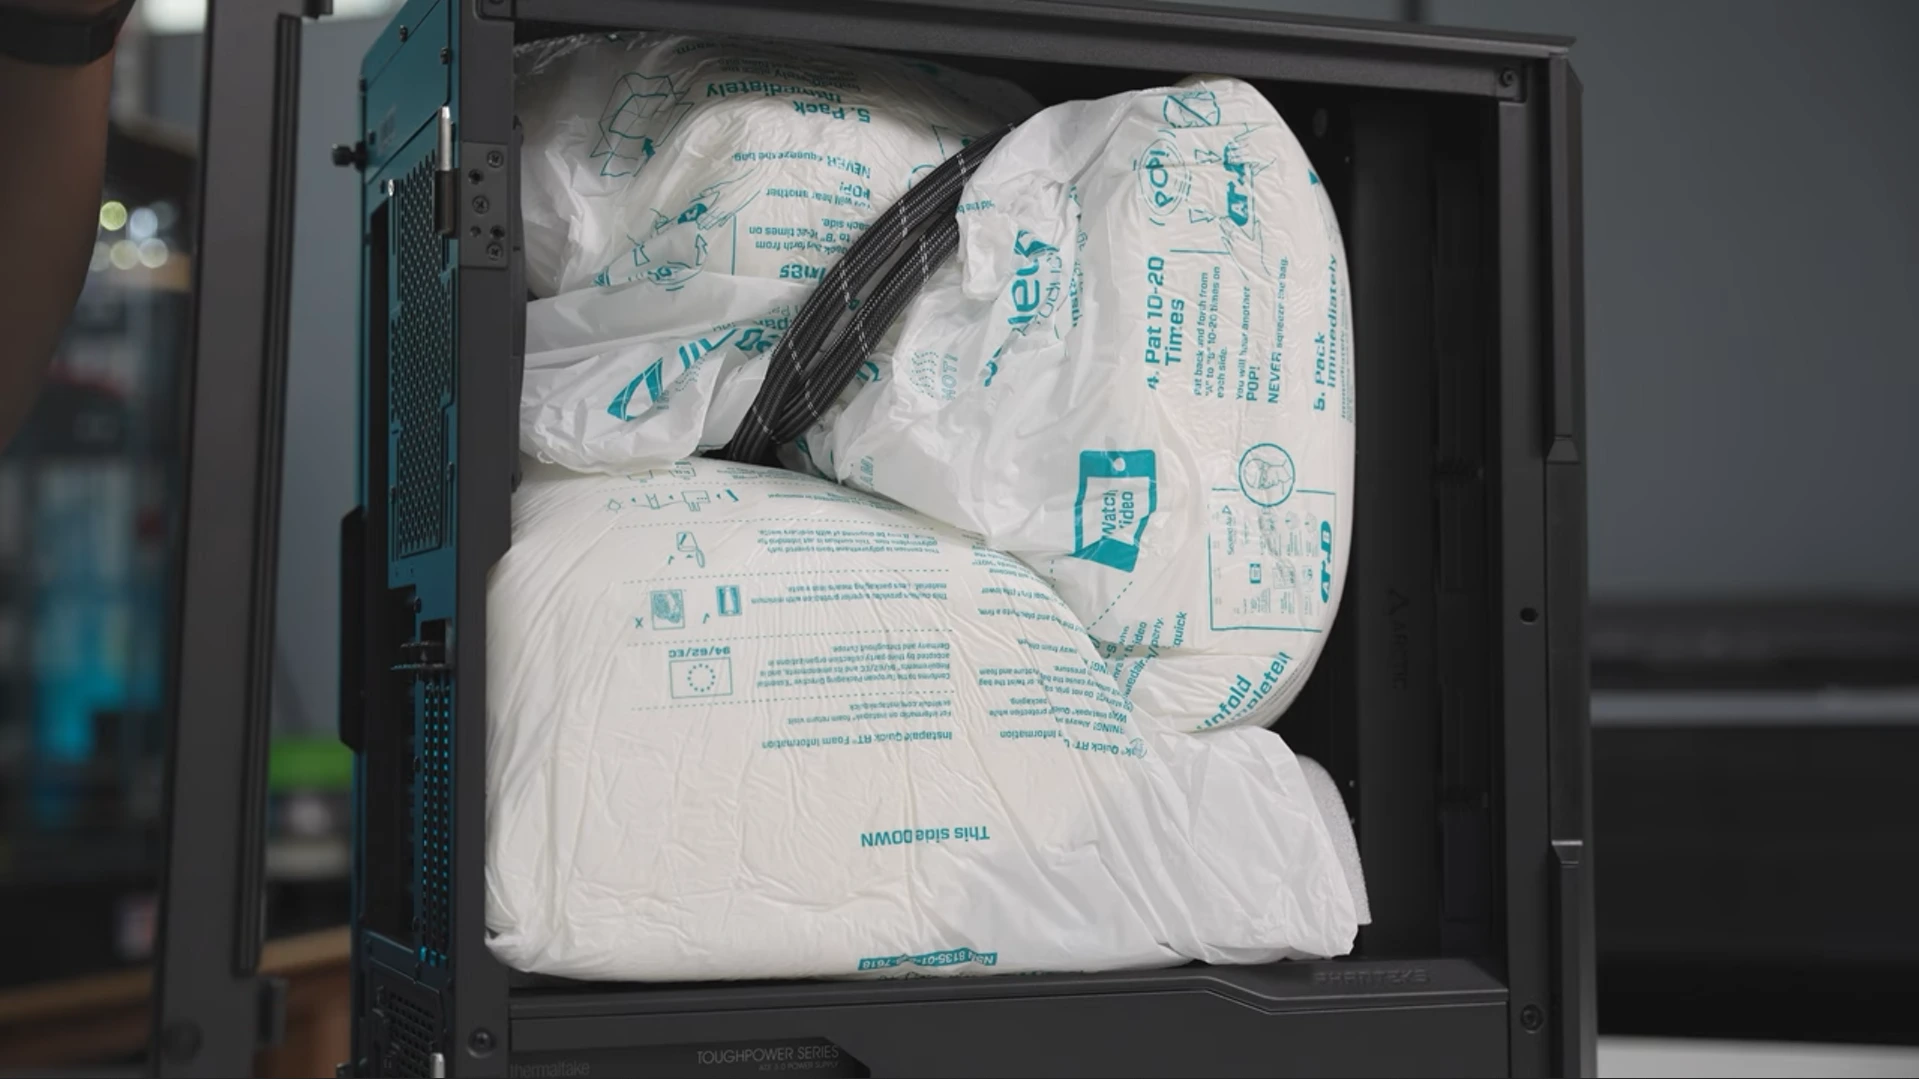
Start by removing the glass door panel of your PC. Simply open the glass panel and lift up on it when it's open fully. Start by carefully removing the foam near the bottom.
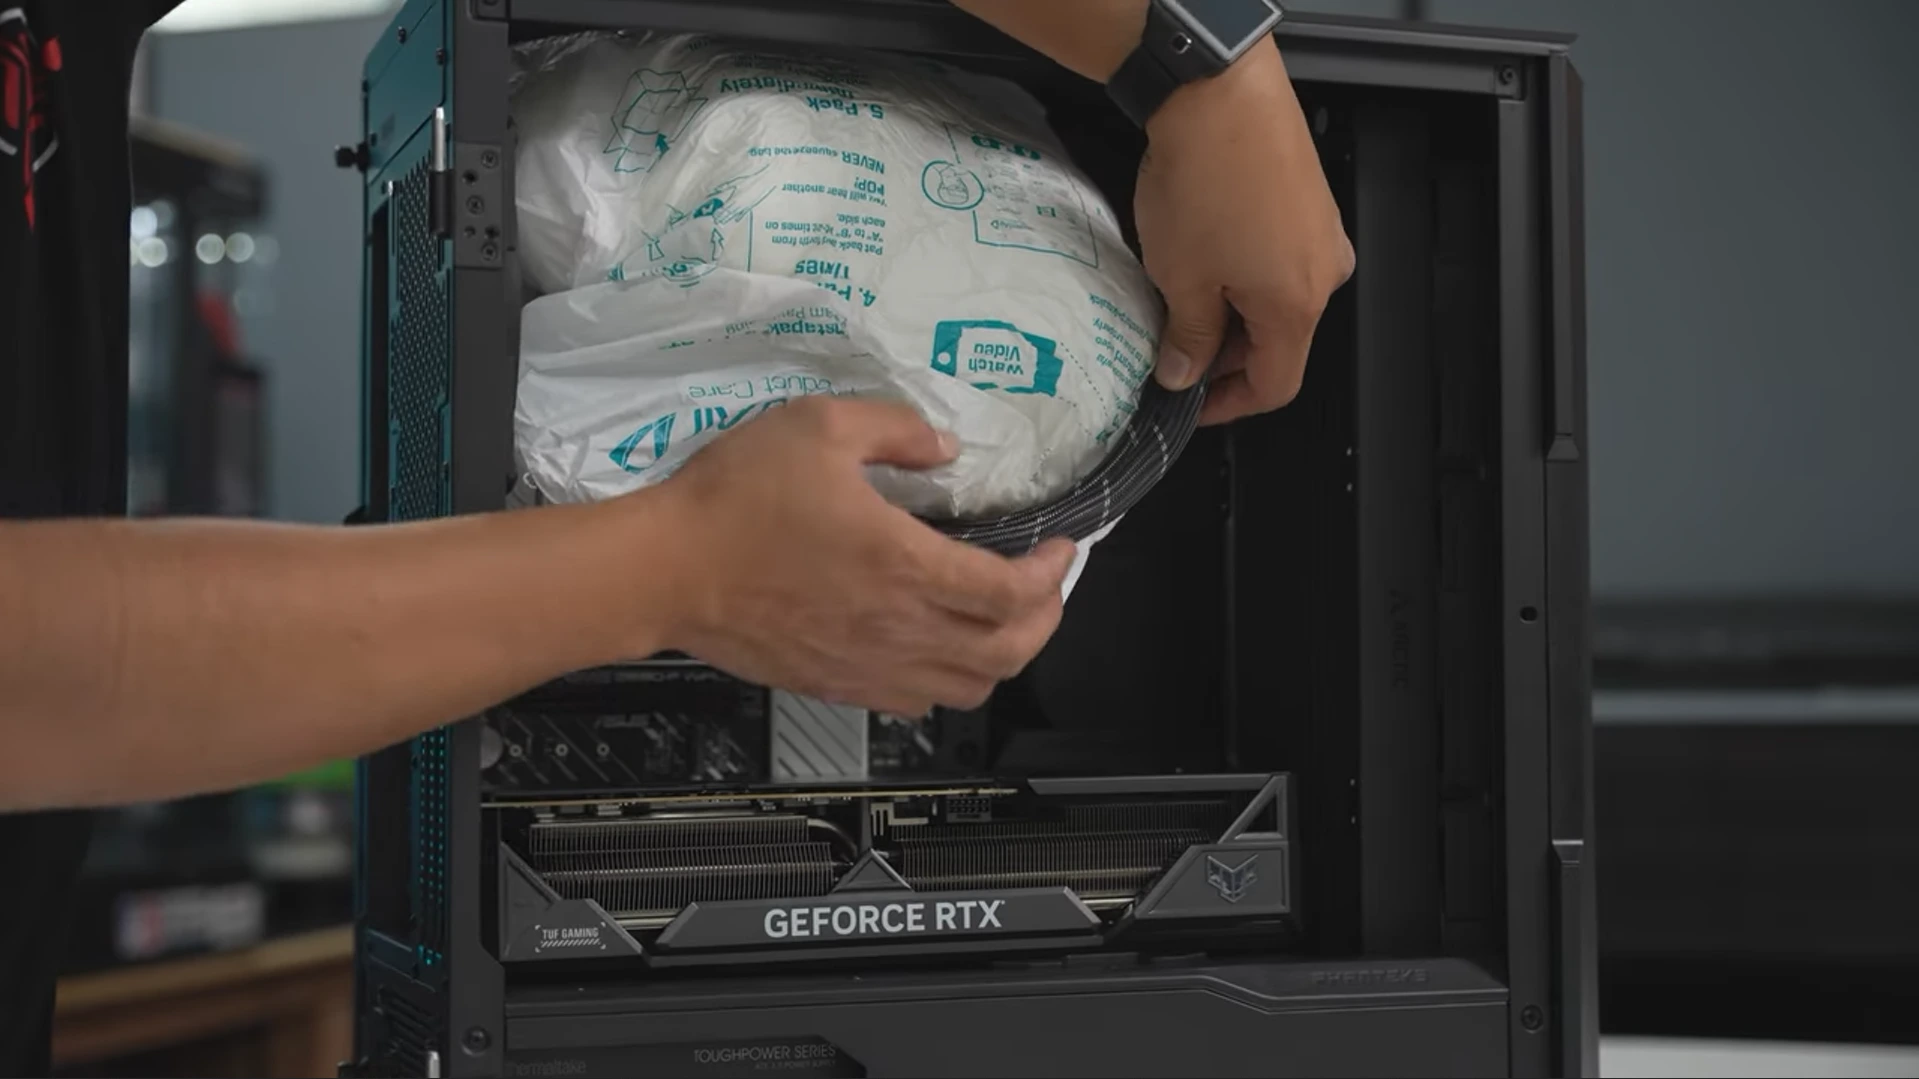
If one of the foam protectors is underneath the AIO hose, gently set it aside as you carefully pull the foam out from underneath.
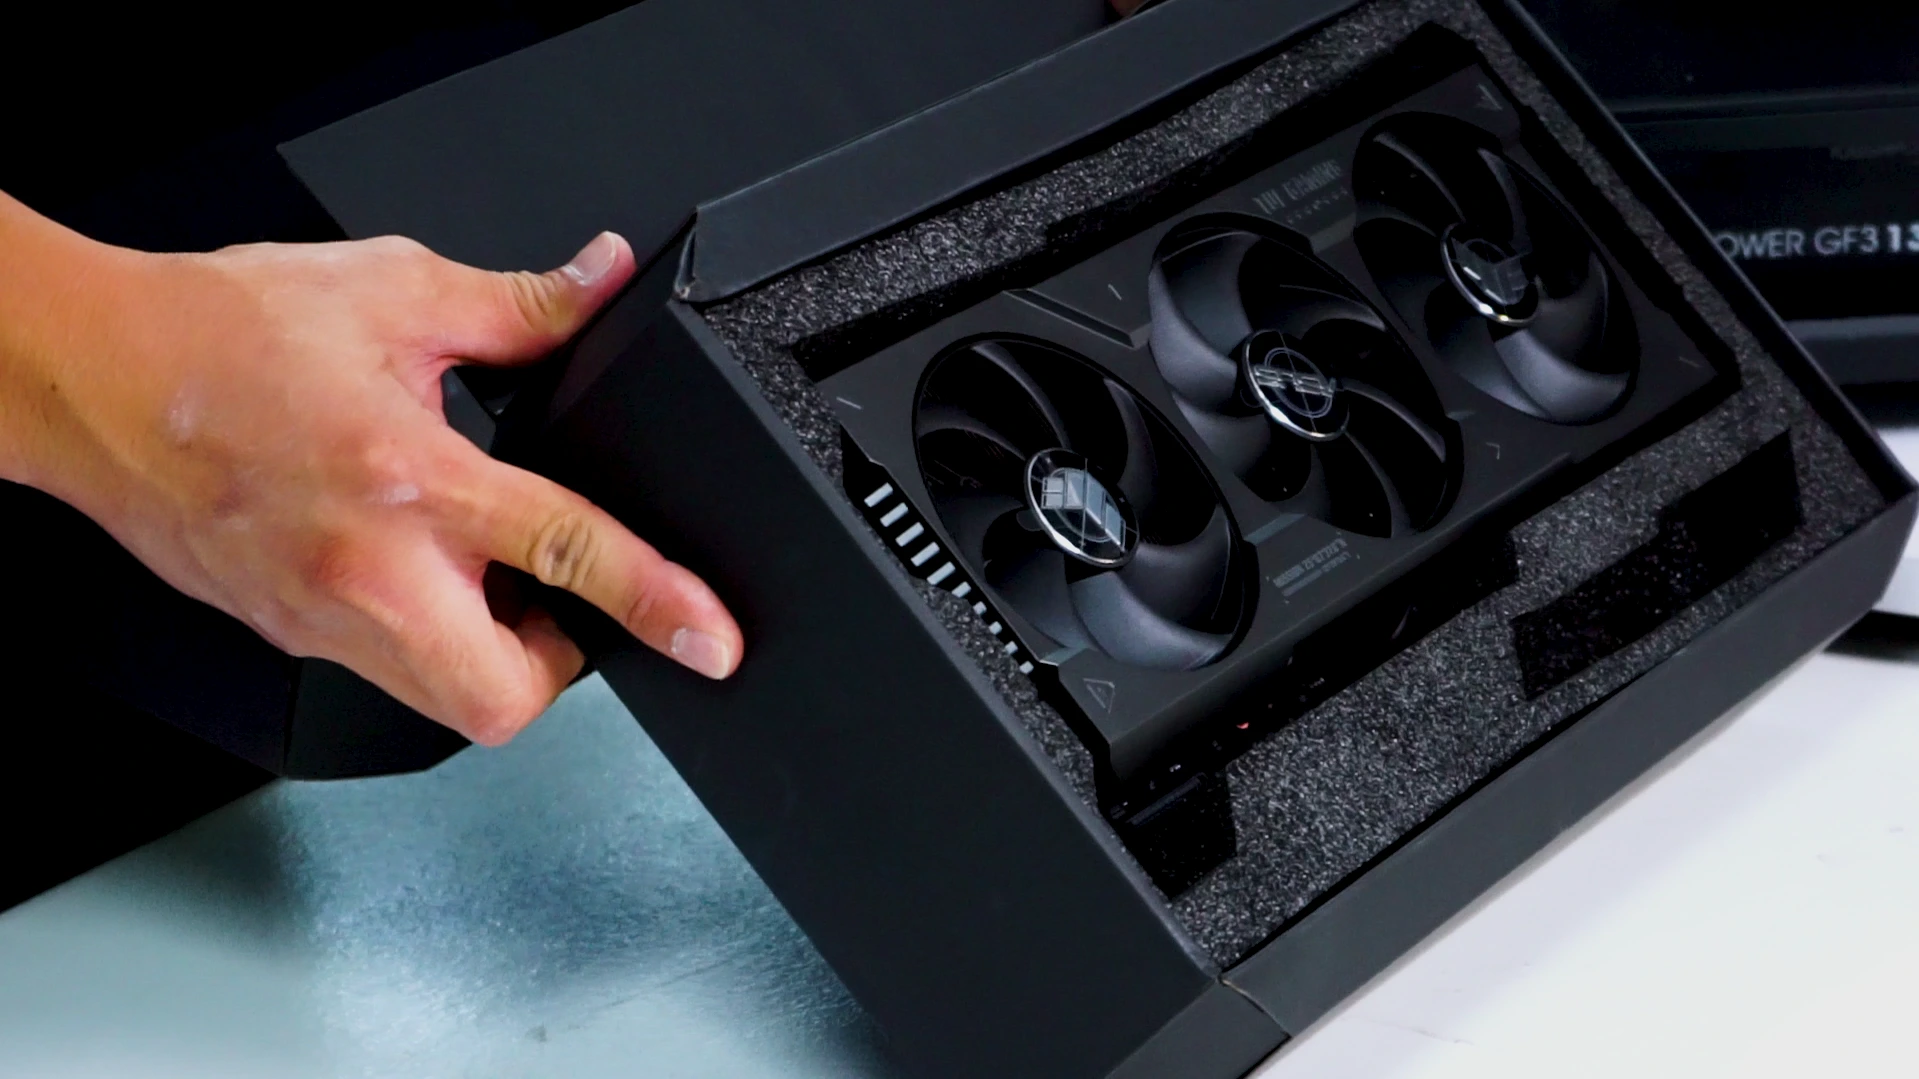
If your PC came with the graphics cards packaged separately
Remove the graphics card from its packaging and continue to Step 4 (3:09 in the video above).
Step 2 Remove card from bottom mount
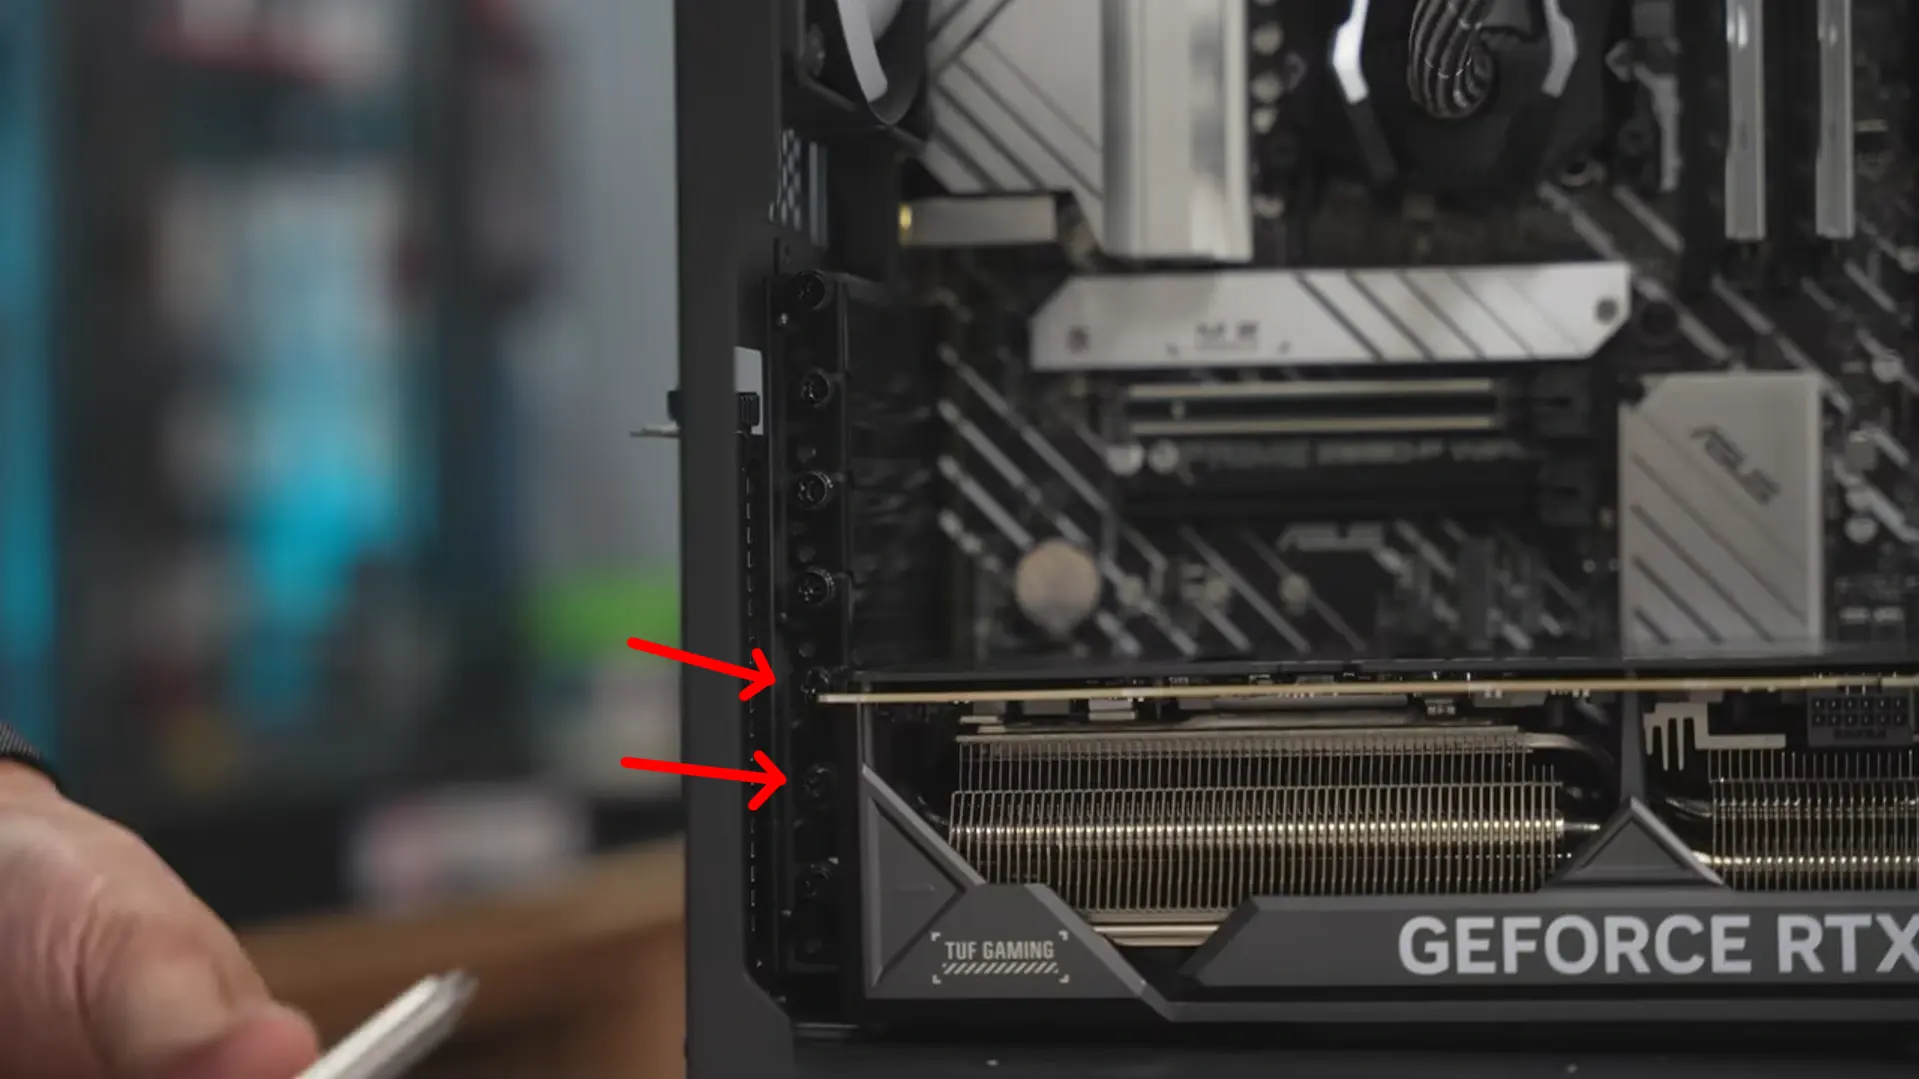
Using a Phillips head screw driver, remove the two screws holding the card into the case. Screws are located at the back of the card on the inside of the case.
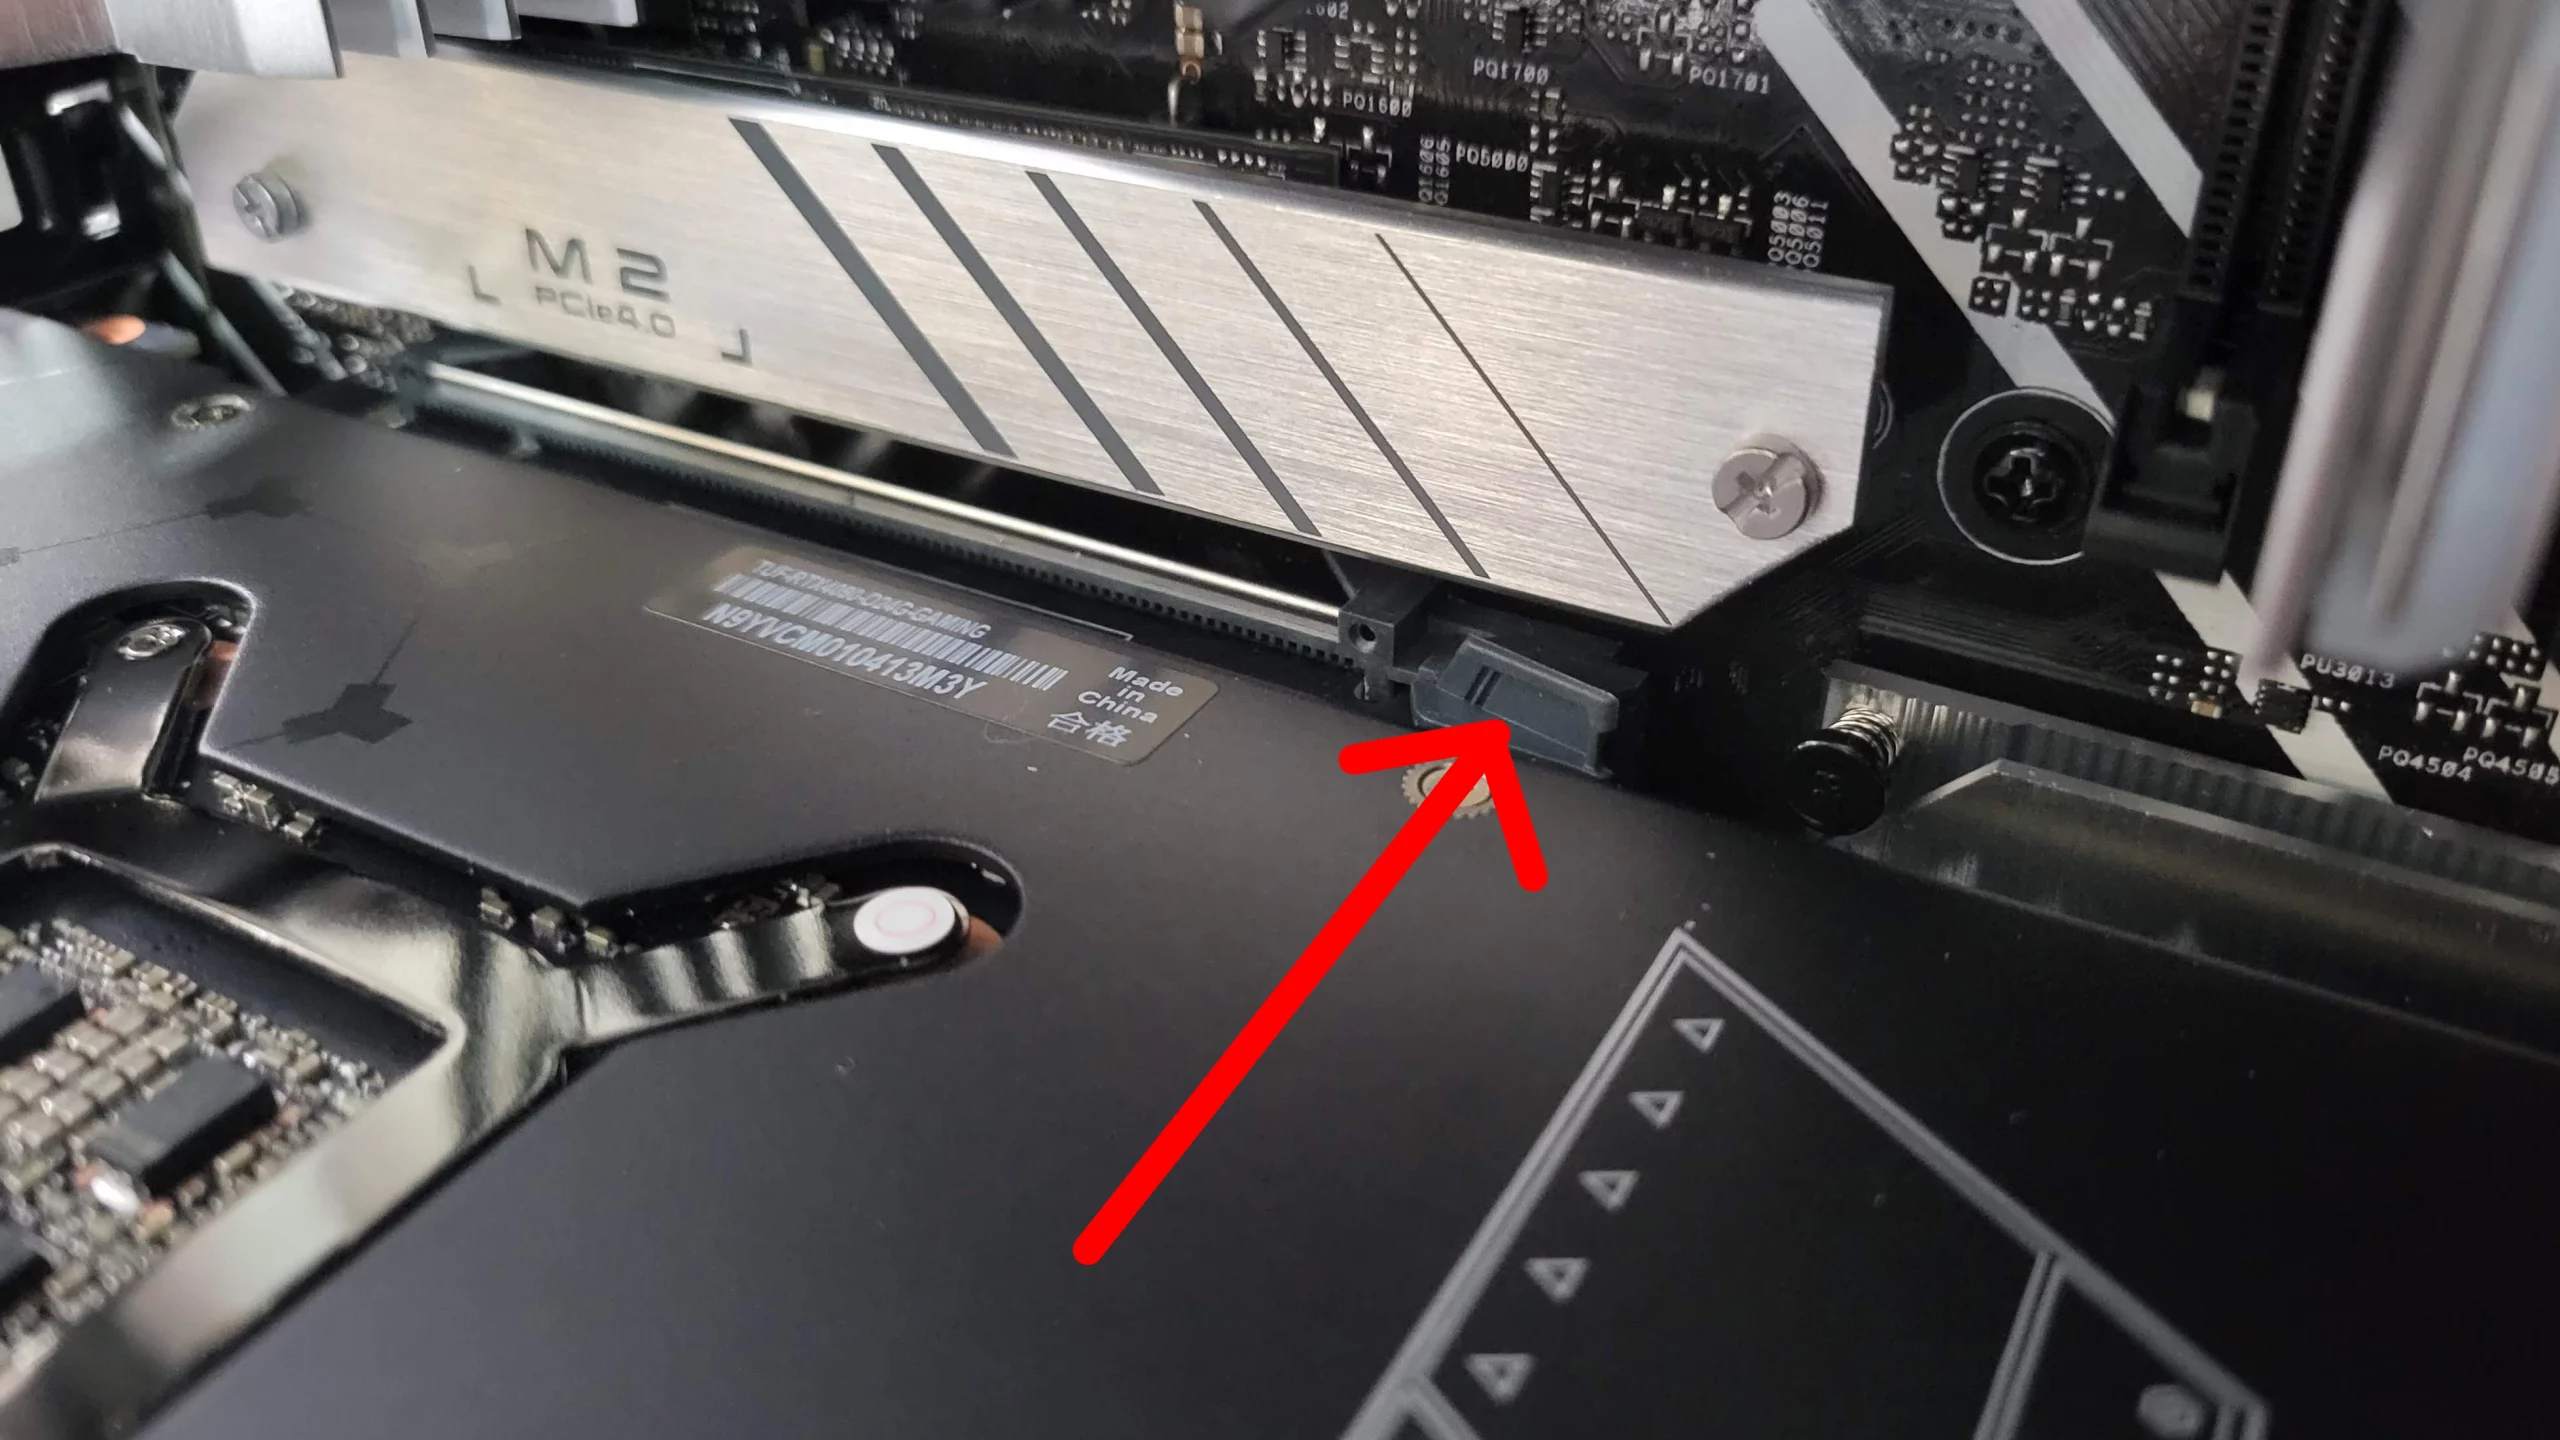
Once screws are removed, press the PCIe release to unlatch the card from the slot on the motherboard, then gently pull the card out of its place.
Step 3 Remove & Transfer PCIe Covers
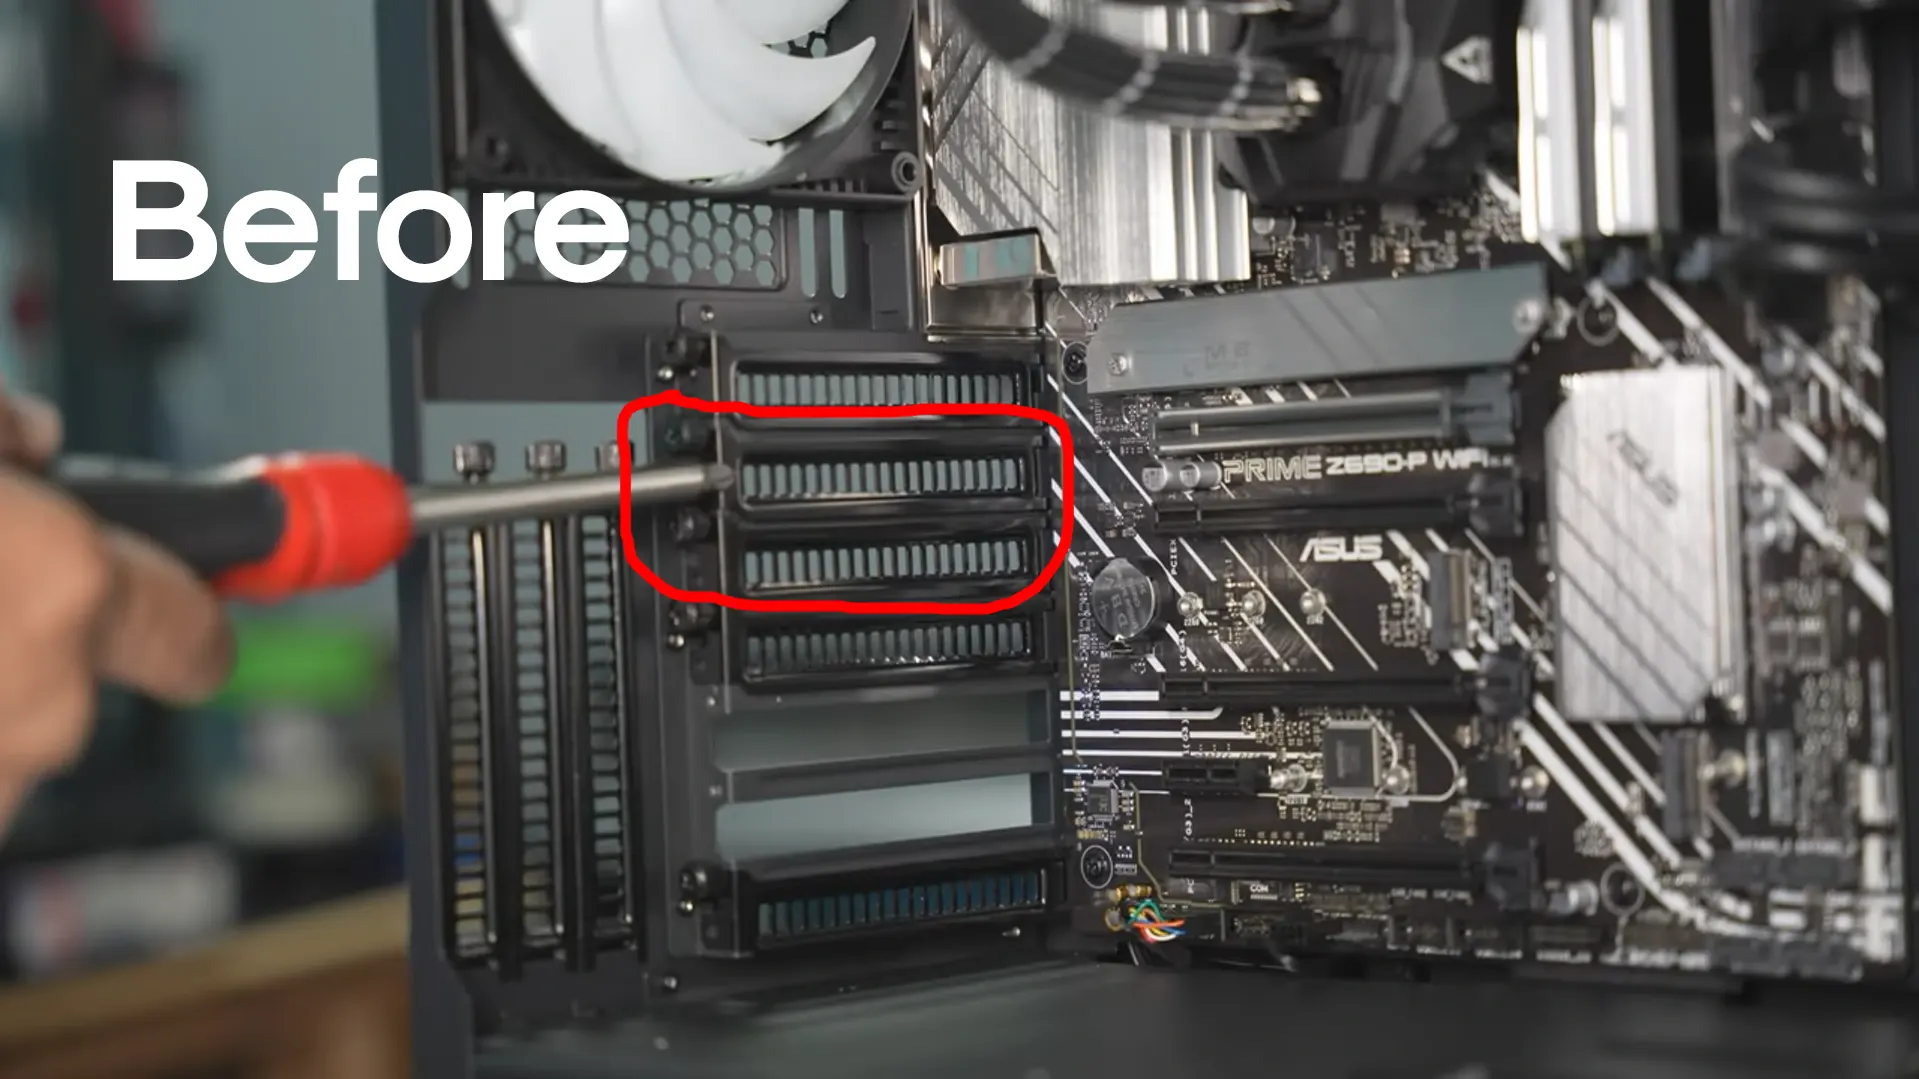
With a Phillips head screwdriver, remove the second and third PCIe covers on the back of the case.
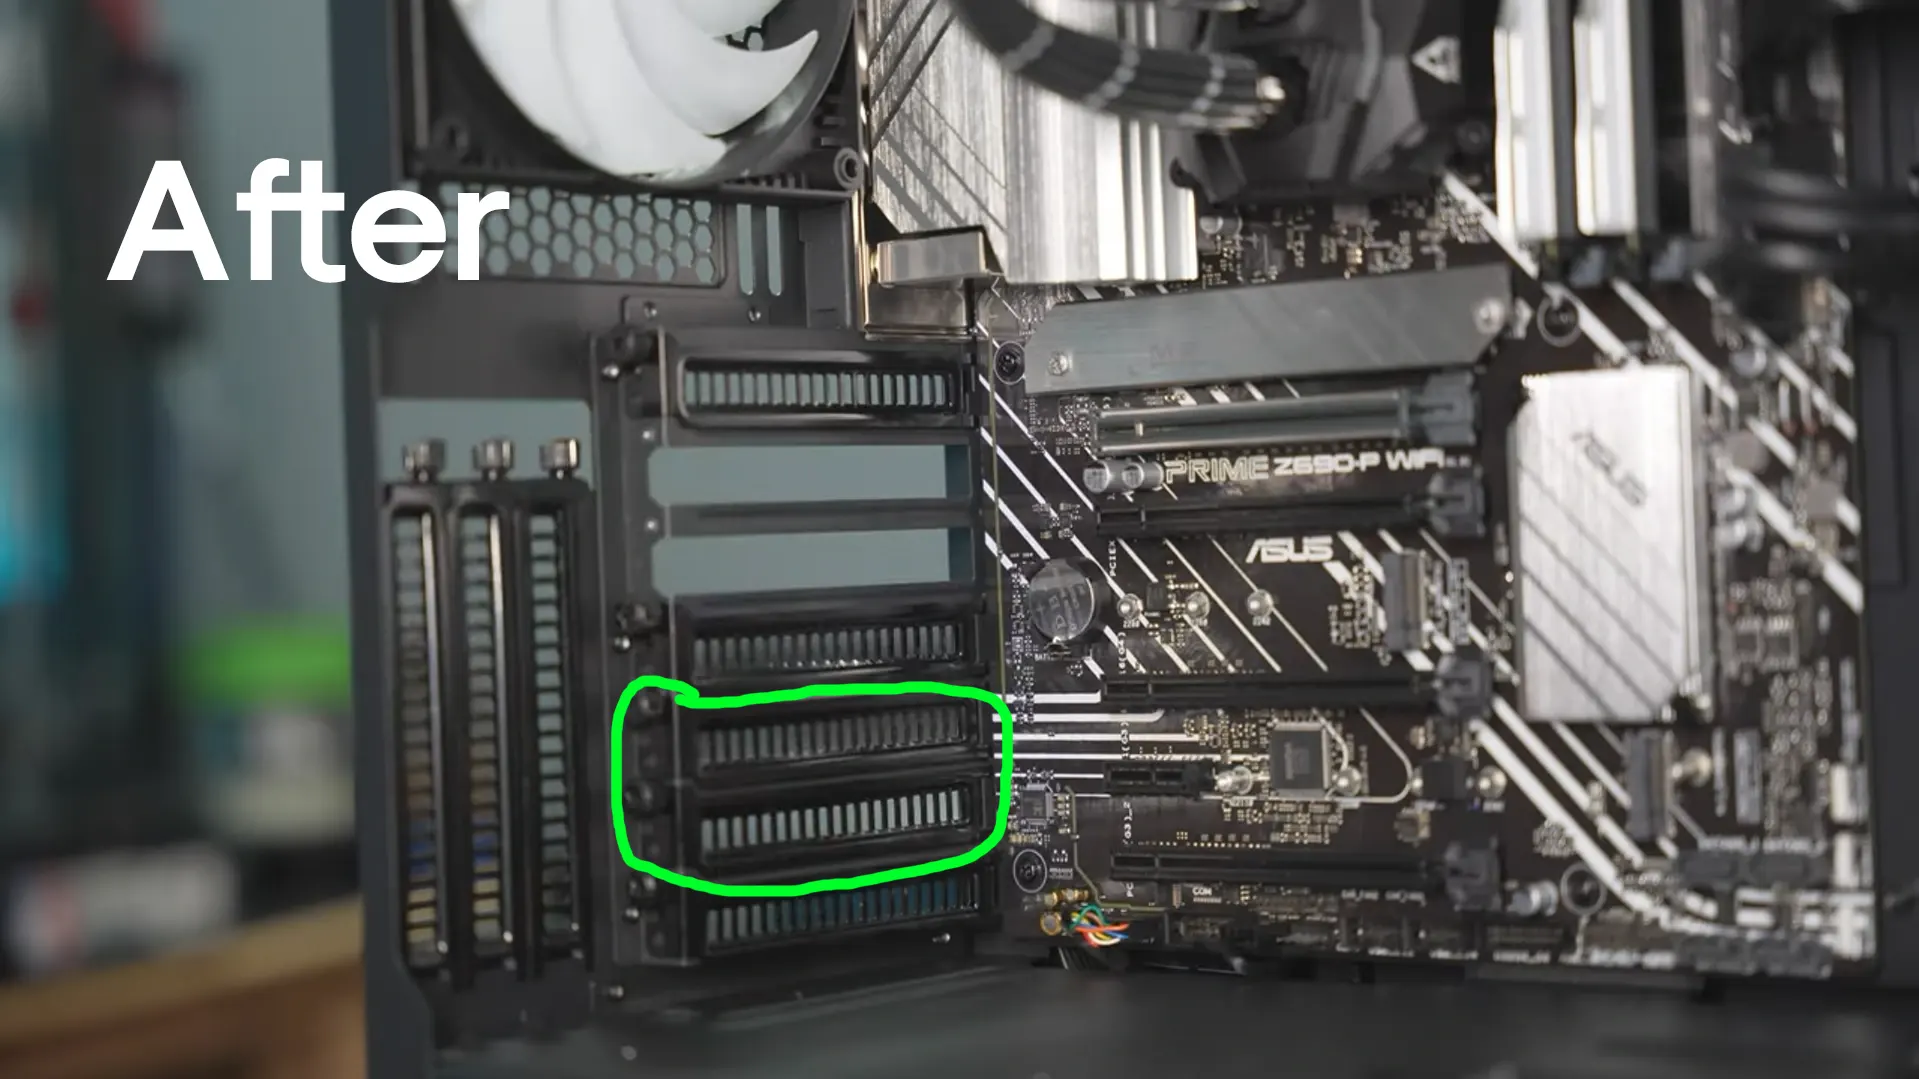
Re-install the PCIe covers into the two empty slot covers where the card was originally mounted on the bottom. This will free up two PCIe covers for you to install the card in its proper final place at the top.
Step 4 Intall Graphics Card on First PCIe Slot
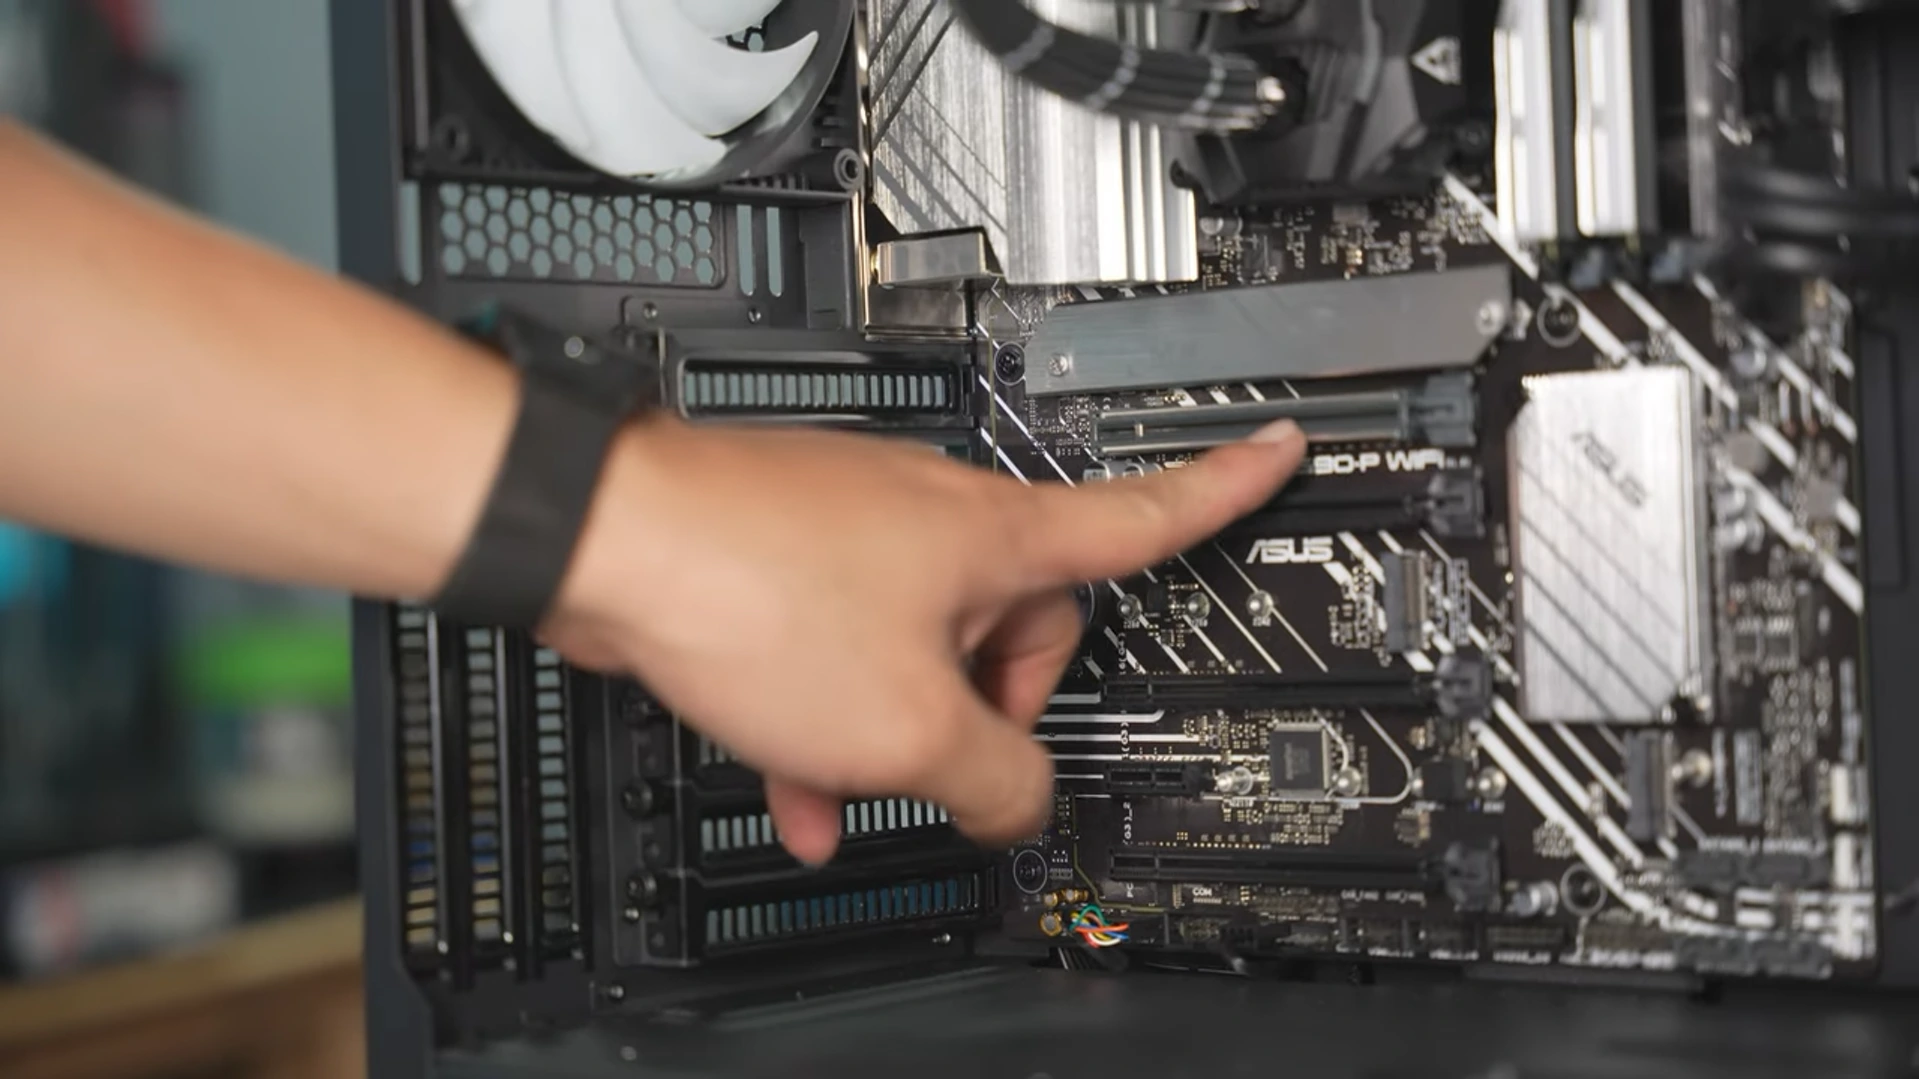
Looking at the motherboard, identify the first PCIe slot as shown here. Pick up the graphics card and align the PCIe card on the graphic card with the first PCIe slot on the motherboard. Carefully slide the card in until you hear a click letting you know it's locked into place.
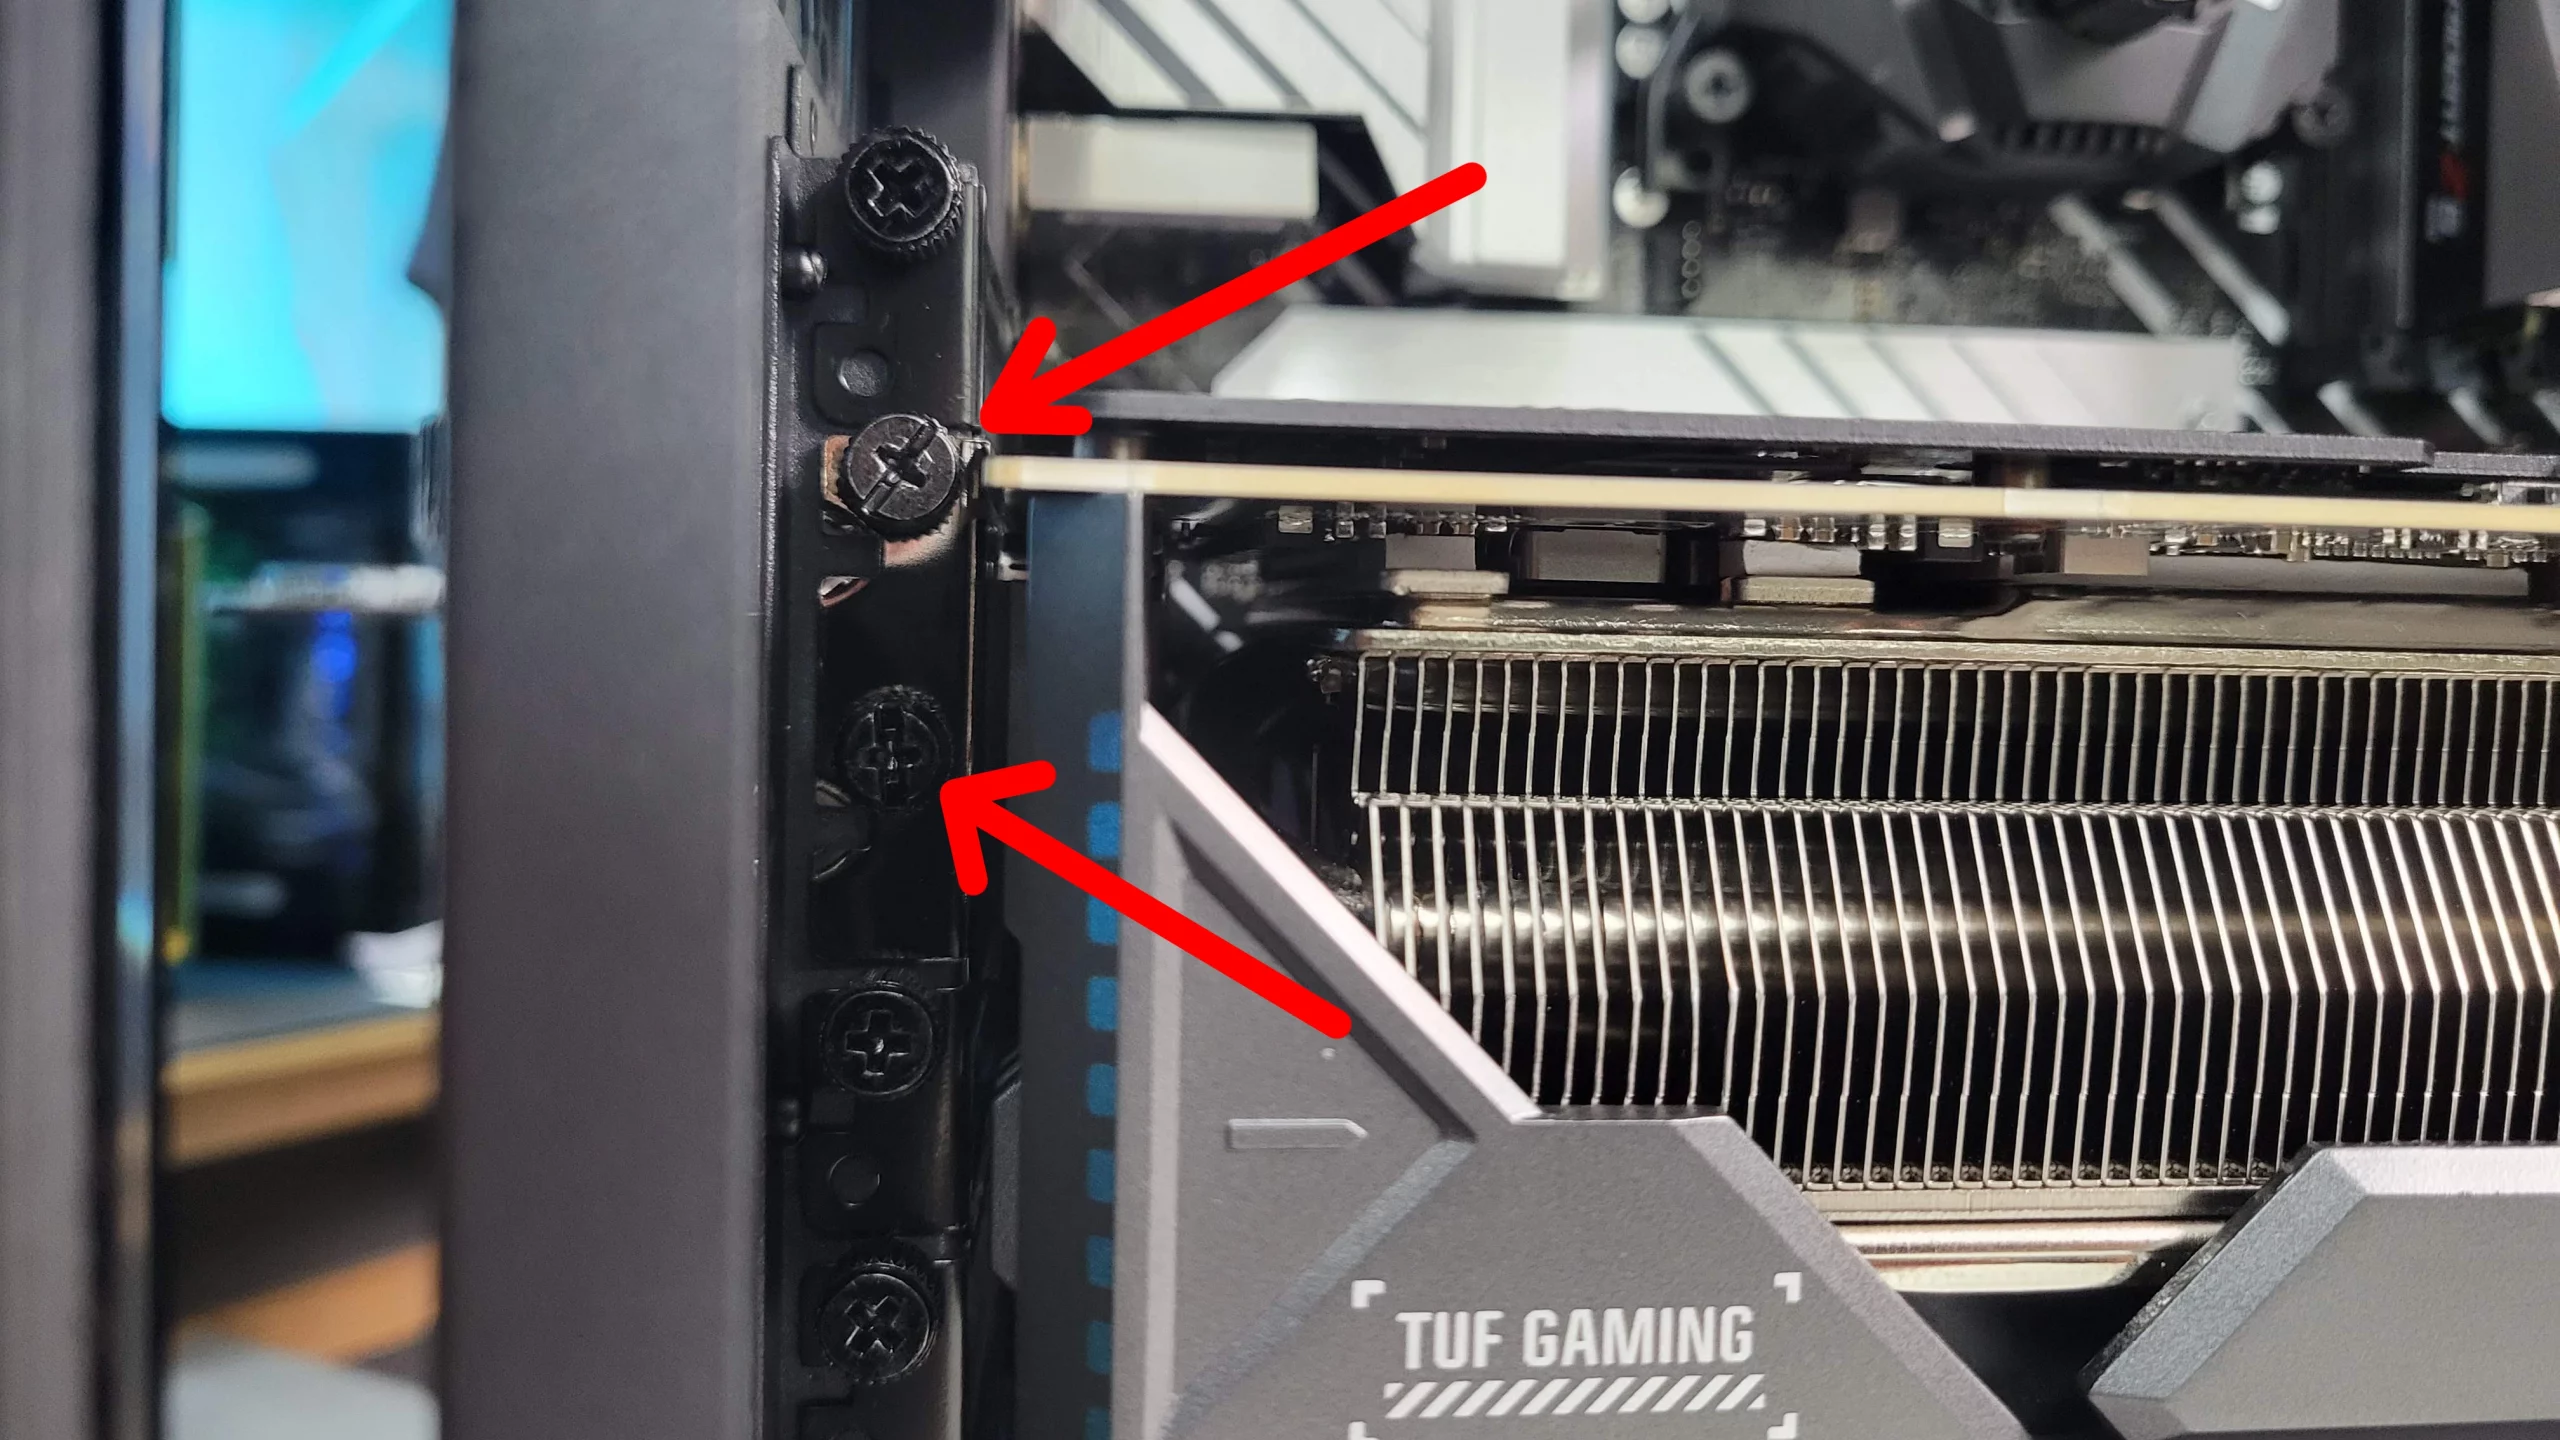
While still supporting the graphics card with one hand, pick up your screwdriver and screw in the two supporting screws onto the PCIe covers on the case to lock the card in place.
Step 5 Plugging Into Power
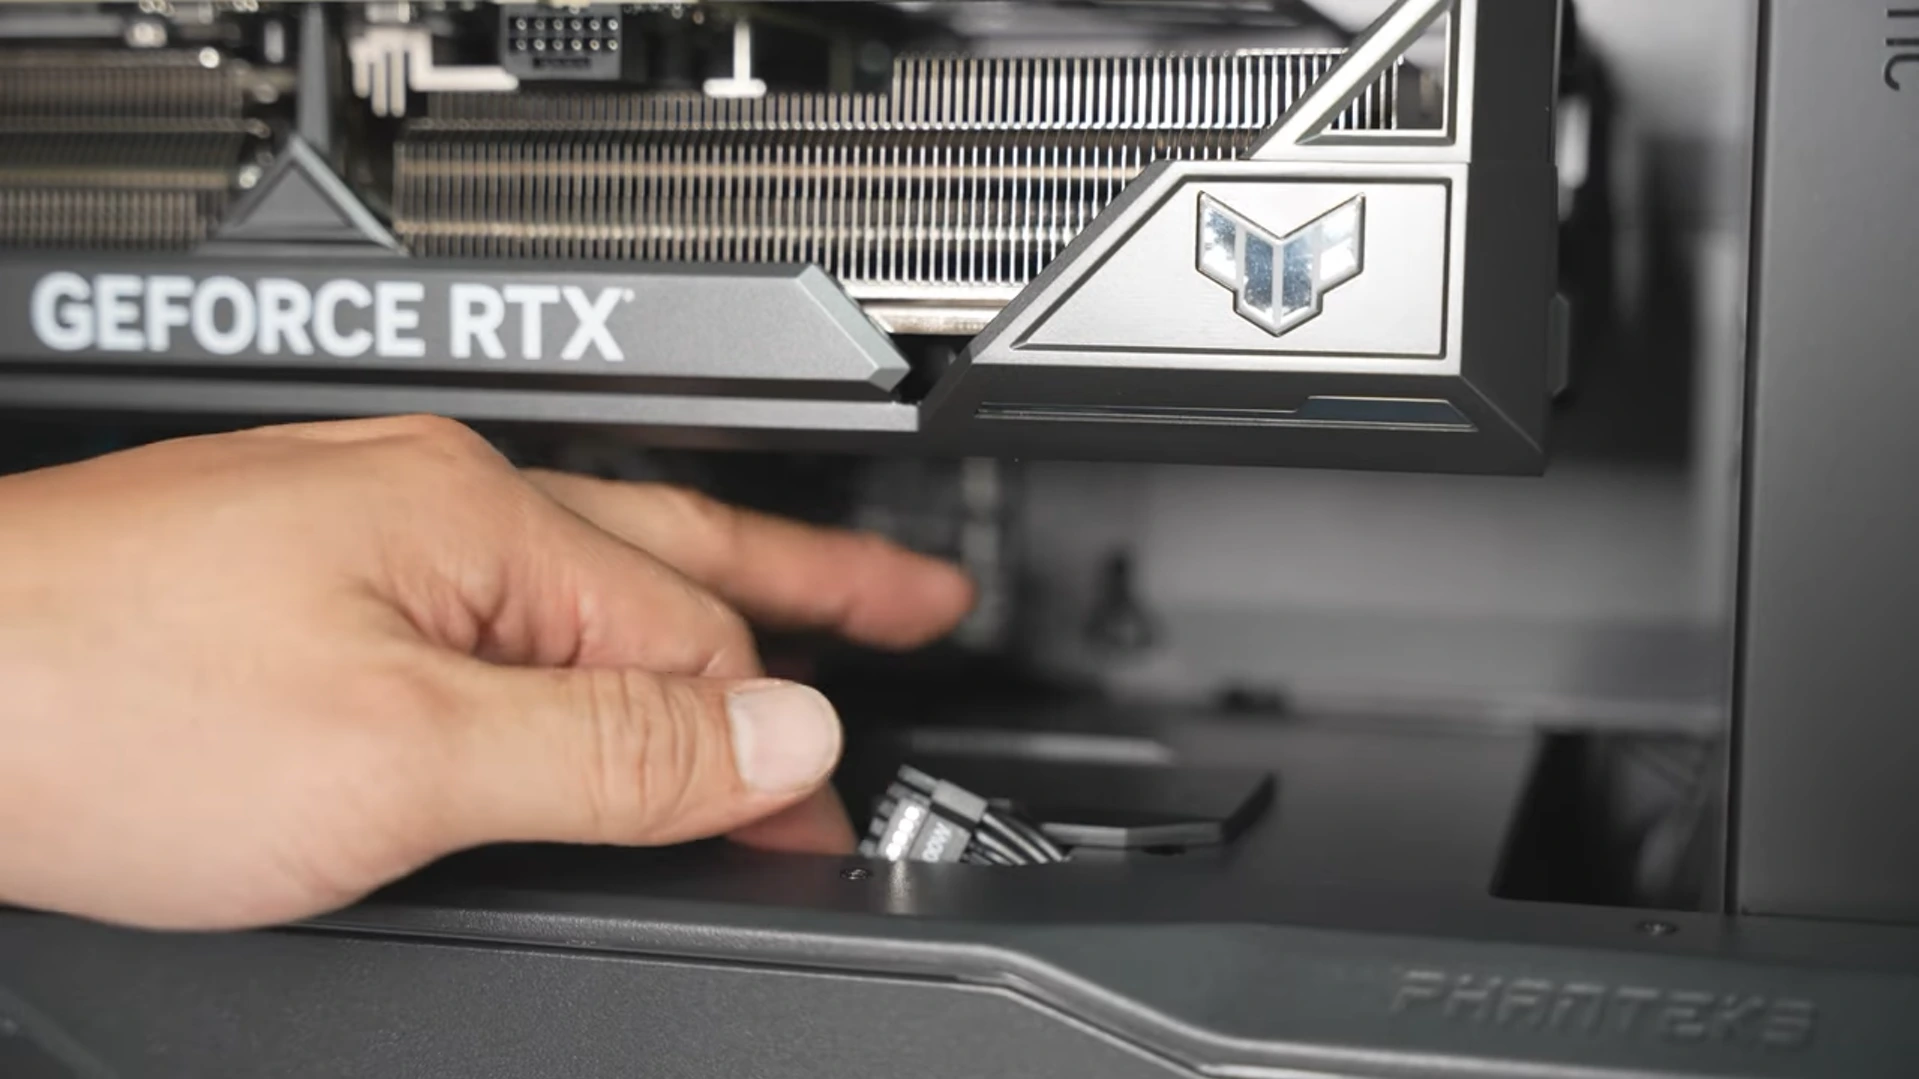
The power cable for the graphics card is located under a small door underneath the graphics card on the bottom of the case. Lift the door and gently pull the power connector out.
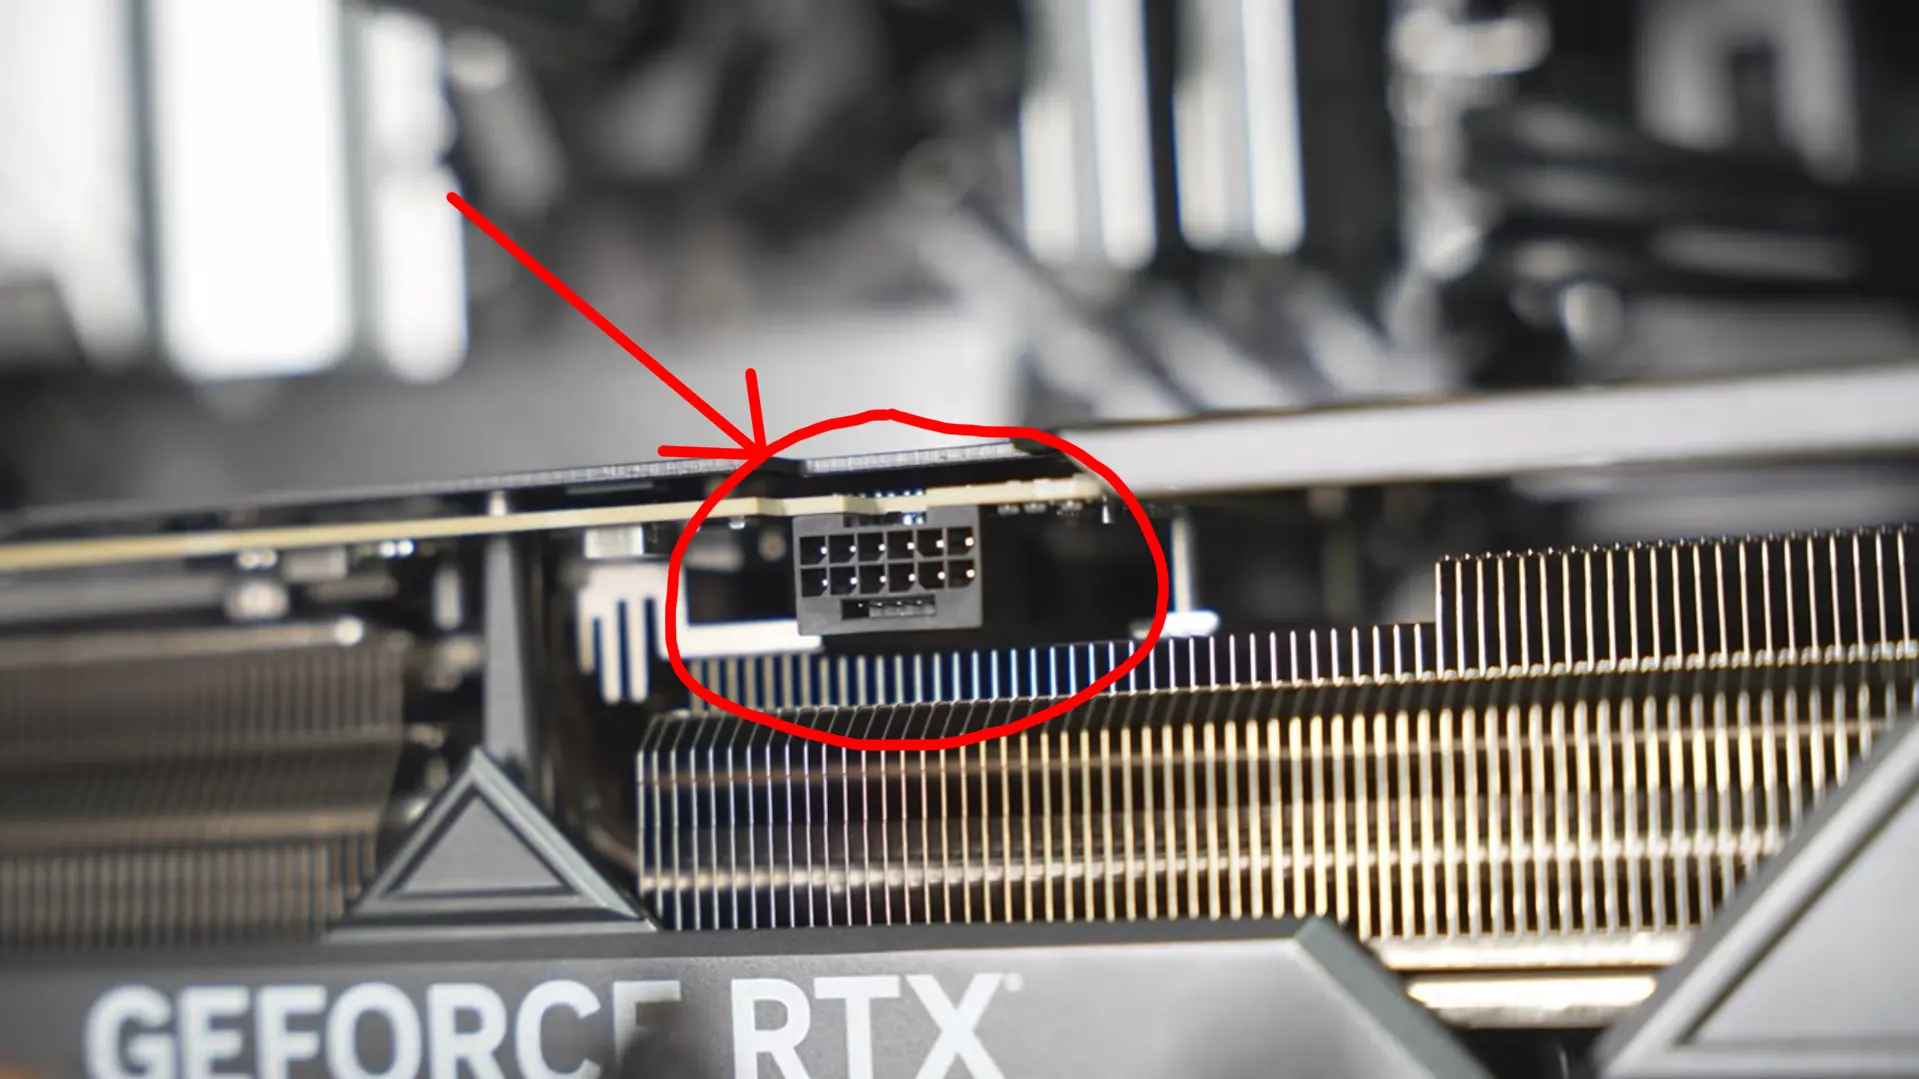
Carefully plug the cable into the graphics card's power connector. Don't force it, be gentle as this cable is very sensitive.
Step 6 Reinstall Glass Panel
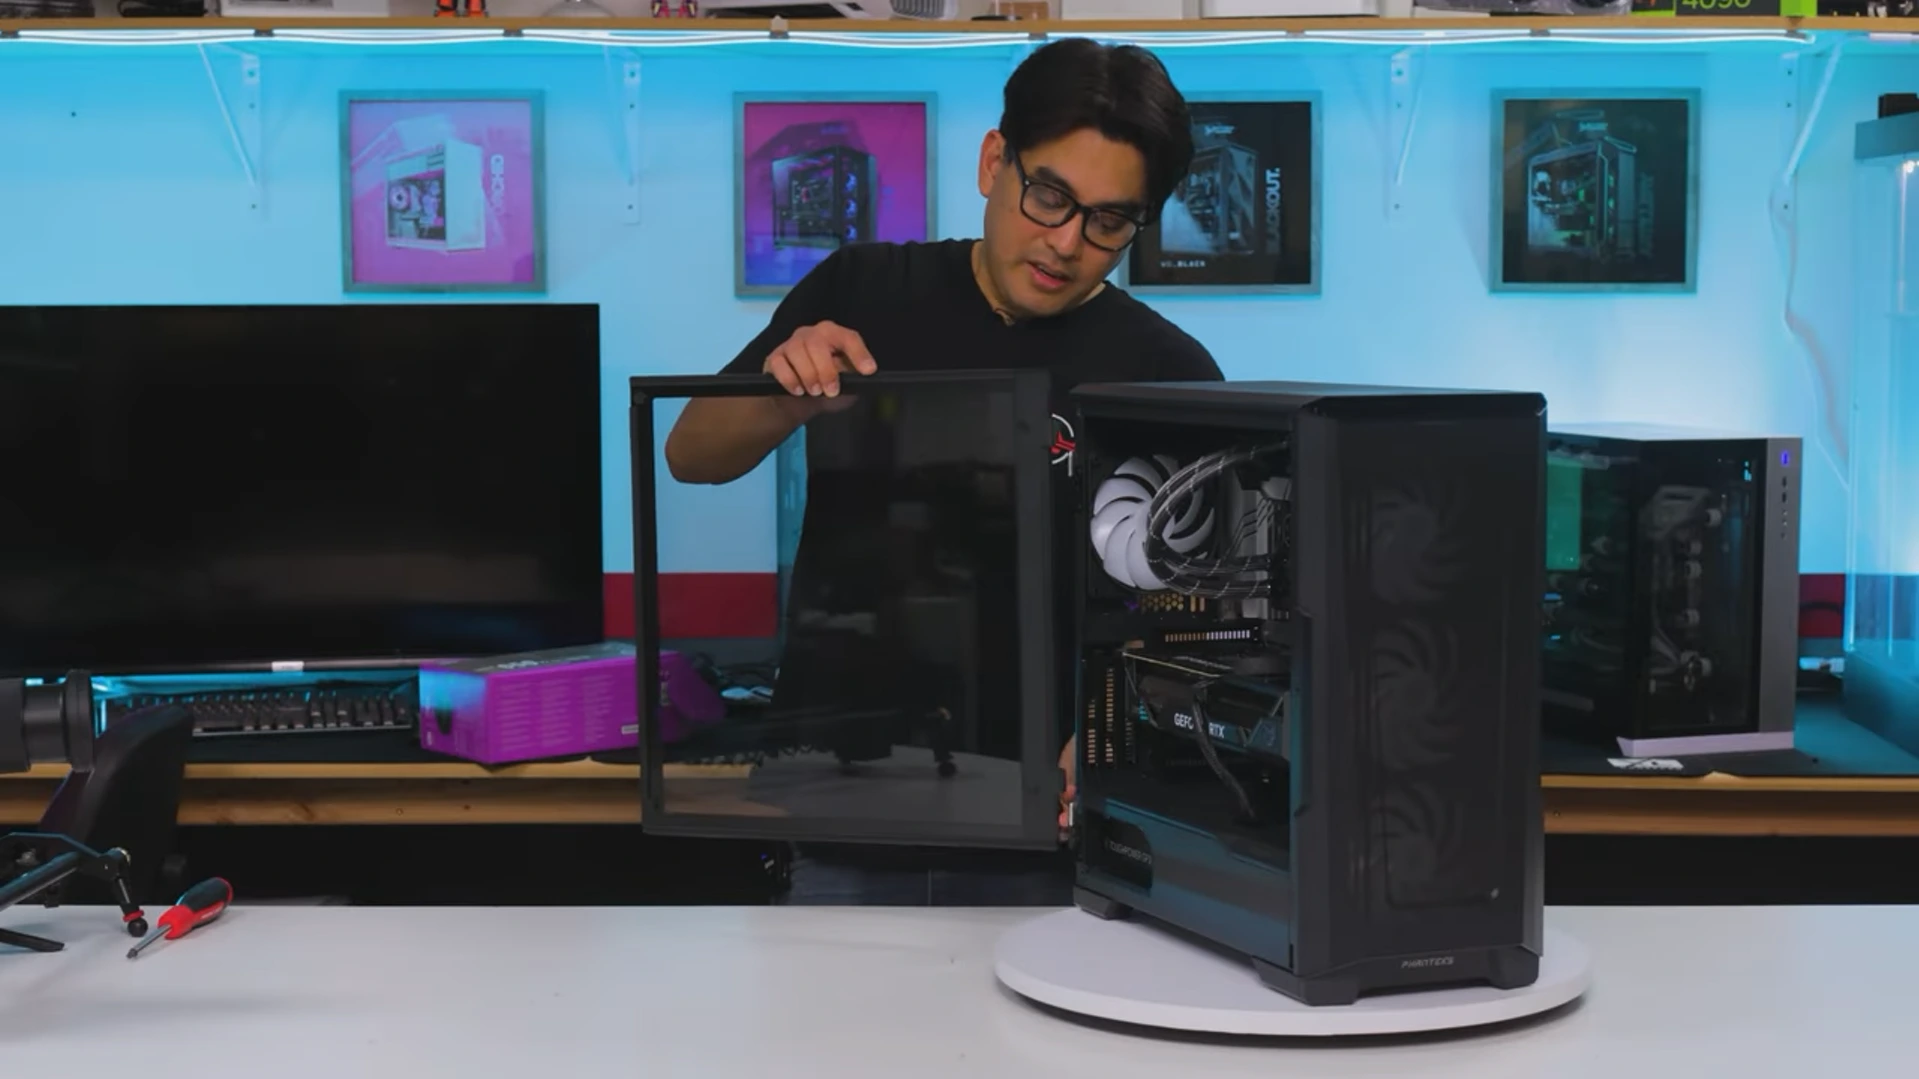
With your graphics card now installed and connected to power, pick up your glass panel, slide it back onto the hinges and close the panel. Your PC is now ready to be powered on.
Congratulations! You’ve just installed your new RTX 4090 graphics card! We hope you enjoy playing all the latest games with maxed out settings. Keep up the good work and have fun!

